Labels

Adama (3) appetizers (5) beauty (7) beef (6) birthday (2) books and writing (14) busy body home life (140) chicken (29) crappy crafting (10) current events (1) dessert (2) drinks (9) fitness (62) food (127) holidays (11) lamb (1) life hacks (1) lists (12) me (39) med (1) media (33) oh baby (117) one-dish (26) paleo (7) pasta (9) pets (38) phone (2) pork (11) randoms (8) raves and reviews (55) salad (4) seafood (19) sick (3) side (1) sides (14) snacks (4) sorrow (3) soup (9) todd (3) travel (7) veggie (23) weather (16)
Showing posts with label veggie. Show all posts

Wednesday, March 19, 2014

Pork Tenderloin with Cherry Sauce and Green Beans


I swear to God last night's dinner was like being transported back to the holiday season. Never mind the colors of the meal, but the flavors were rich, decadent and thanks to the port in the sauce, downright merry.

I got this recipe from Country Cook's Illustrated's 30 Minute Suppers section and in a true moment of laziness, instead of writing out the recipe here, I took a picture of the recipe card.

Now, CCI and I have butted heads in the past because there's no way to verify to them that you're already a paid member when browsing their recipes online; they want a credit card number for a two week trial membership, and that really pissed me off. But I will say that if you're in the market for a new food magazine subscription, then give these guys a shot. And not just Cook's Illustrated, but Country Cook's Illustrated, as the latter has those handy cards. Like so:


And yes, some cherry sauce got on the card during my haste to plate this dish up and snap a photo before I tore into it like a rabid dog. This recipe was beyond easy, and we all have seen that selfsame green bean recipe but if you want it OMG NOW, here:

Green beans: trim and parboil green beans til you can pierce them with a fork, then drain and place in ice water. Once cool, wrap them in a clean dish towel to dry.
When ready to cook green beans, put skillet over medium heat with a couple tsp - one tbsp butter. Once they're heated through, add half a minced shallot and about 1/4 cup finely snipped parsley. Toss to coat and cook a further couple of minutes to soften the shallots. Donezo!

Tuesday, December 3, 2013

Low-Carb Caprese Bites


I absolutely hate how blurry this photograph is, but I was in between making a pie and a soup for a luncheon and was in a hurry. It was the only one I took so this is all I have, but since we're so close to Christmas, the colors really are perfect for a light, healthy appetizer for a holiday party. Plus they're quick and easy to make, so long as you have nice, big basil leaves to use. I ran out and actually had to utilize a sloppier method of pinning two leaves per toothpick, so instead of the 24 I wanted to make, I settled for 18.

Low-Carb Caprese Bites
makes 24

1 tub mini mozzarella balls from Trader Joe's
1 1lb package Mini Pearl tomatoes from Trader Joe's
24 large, rinsed basil leaves
24 toothpicks (obviously)
1 tsp Balsamic vinegar
1 tsp extra virgin olive oil

So, I'm sure this is pretty self-explanatory. Pierce the basil leaf, then the cheese, then the tomato, and the basil leaf again to make a cute little boat. Repeat 23 times. Add a little sprig or two of basil, you know, for flair. For pizzazz.

Refrigerate, covered, until ready to serve. Mix your vinegar and oil well, then using a spoon, drizzle the dressing over your little basil boats. Presto!

These were really yummy and a welcome alternative to heavy cheeses or pates or dips you typically encounter this time of year. And I originally wanted to call them No-Carb, but since there is a WHOPPING .47g of carbohydrates in a cherry tomato, I didn't want to lie to my audience.


Friday, October 4, 2013

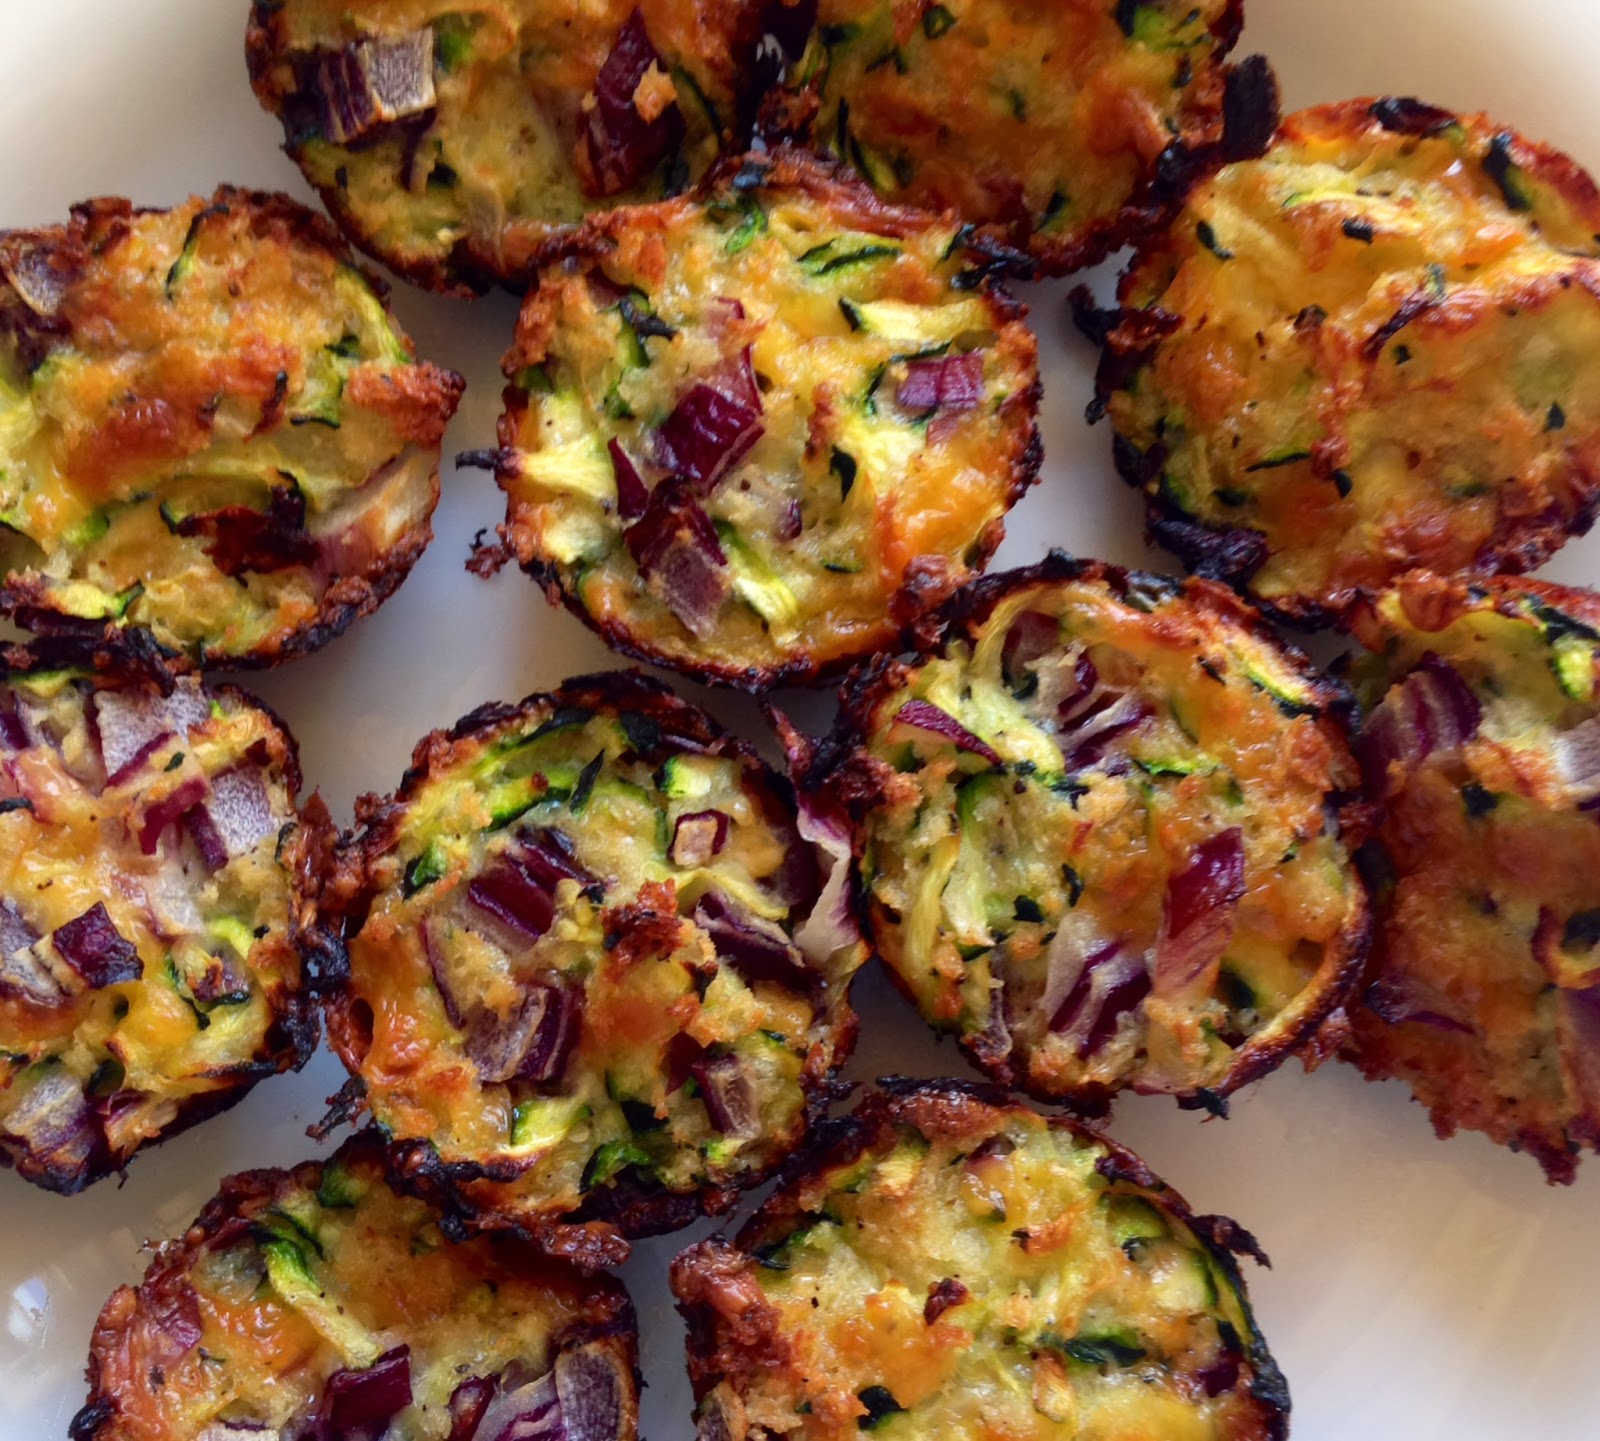
Zucchini Tots


You know it's a good recipe when after taking one bite you pick up your phone and text two friends about it. That's what happened this past Wednesday after I attempted the first batch of these delicious little devils. I have two friends, Kendra and Amber, who have zucchini in their gardens and are always looking for new things to do with the prolific courgette. These are absolutely perfect.

The only issue for some people is that they call for a mini muffin tray. Totally worth the purchase, for this recipe alone. Anyways, I found this on Pinterest but made some tweaks, so here goes.

Zucchini Tots
makes 24 (serving size is three, supposedly)

2 large zucchini
1/2 cup panko
2/3 cup shredded cheddar
1/3 cup finely diced red onion
2 large eggs
Garlic powder, to taste
Trader Joe's 21 Seasoning Salute, to taste (AKA go batshit crazy)

Preheat oven to 400 degrees. Spray a mini muffin pan with cooking spray, or grease with butter. HAVE FUN WITH IT FOLKS.

Grate your zucchini using the large size on your box grater. This goes so quickly and easily, even for accident prone moi, that I don't recommend lugging out the foot processor and fitting it with the grating tool.

Take a clean, thin but durable dish towel (mine tore) and use it to squeeze out all the moisture from the zucchini. This takes several twists and squeezes.

Add all the ingredients, pell-mell style, in a large bowl and stir to thoroughly mix everything together. Fill each of the muffin cups to the top, pressing down to make sure they hold together when you remove them.

Bake about 18 - 20 minutes, until the tops are golden. Now, the original called for 16-18 but in my notoriously, infamously over-hot oven, it still needed at least 18 minutes. Plus, at the halfway mark I turned the pan around to make sure everything was even.

For those of you 1%ers who have convection ovens then WHATEVER man.

After they're out of the oven, I recommend popping them out and serving soon after, so long as you take care not to burn yourself. They're amazing cold and warm, but nothing beats them when they're hot.

Easy to reheat and to freeze, they are just amazing. I think they're better than tater tots thanks to all the yummy ingredients, but maybe I'm crazy.

Enjoy! They rock with a little bit of ketchup as a side to a delicious grilled steak.

Friday, June 7, 2013

Broccoli Salad


I guess there is a reason why chefs and food photographers wipe the sides of the plates and bowls before presentation, huh. Anyhoodle, I came up with this on the fly two days ago while trying to find a filling, yet flavorful and satisfying snack. I've been really trying to watch my calorie intake, which is always a lot easier, in my opinion, in the summer. Fresh veggies are everywhere, it's warmer outside which lends itself to naturally eating lighter, and the word salad just sounds so refreshing. Talk to me about salad in winter and I'm going to hit you over the head with a soup ladle and continue to gnaw on a ham bone. But for now, salad salad salads!

This bad boy rings in around 115 calories, if you aren't counting the calories from the onion. Since a full cup of red onion has 48 calories, I am not bothering to figure out what three slices are. I like to live life on the wild side. I am the Hunter S. Thompson of calorie counting.
Broccoli Salad
single serving

3oz broccoli florets, cut into bite size pieces
Sliced red onion, to taste (I do about 3 thin slices off half an onion)
1 tsp olive oil
1 tsp balsamic vinegar
2 tbsp blue cheese crumbles
black pepper, to taste

Toss the first two ingredients with the next two, and top with blue cheese and black pepper. Stir around. Devour!

The first time I made this with shredded parmesan but I have to say, the blue cheese really adds a rich dimension to it and I'll not go back. And you know how much I love parmesan. Just so long as this salad doesn't dip too aggressively into my blue cheese stash. Those martini olives aren't going to stuff themselves with air, are they.

Monday, April 29, 2013

Parmesan-Panko Zucchini Fries

So! We had these with our burgers last night and my goodness they were tasty. My only problem was that I should have salted the zucchini before breading them. The recipe I had used did actually suggest salting both the flour and the egg. So that's what I am going to do next time.


Parmesan-Panko Zucchini Fries

3 zucchinis, trimmed
1/4 cup flour
salt and pepper, to taste
2 eggs, beaten
Panko breadcrumbs
About 3/4 cup Parmesan
2 tbsp dill
olive oil spray

Preheat oven to 425 (my oven runs hot so I did 400) and position a rack to the center of the oven. Line a cookie sheet with parchment paper and set aside. In a big bowl, add the flour, a generous amount of salt and a bit of pepper. In another bowl, put your beaten eggs and in another bowl, put the Parmesan, Panko and dill and mix thoroughly.

Cut the zucchinis crosswise in the middle and cut each half into eight wedge sticks. Add all the zucchini sticks to the big bowl with flour, and toss around to make sure each is coated. Shake off excess flour and dip your zucchini fries into the egg, then roll in the Panko-Parmesan mixture.

Line the fries up as shown in the photo, spray with the olive oil spray and bake for 15 minutes. To ensure even cooking, at the 15 minute mark turn your pan around and cook another 10 - 12 minutes (again, my oven runs hot so they were done at 10 minutes).

Enjoy!

Friday, February 22, 2013

Holy Hash Browns, Batman!

Did I just say hash browns? I sure did! JUST LOOK:


Yes, yes, it's an artless photo, but look past that and focus on the crispy crunchy cheesy crust on that bad boy. BUT WAIT. Aren't I on a low carb diet? Why yes I am! So it may shock and horrify you to learn that this hash brown casserole is actually comprised of spaghetti squash! Not a potato in site! PHENOMENAL. I got this recipe from Detoxinista and, like all the other recipes I've tried, it was just delicious. AND HEALTHY.

Cheesy Spaghetti Squash Casserole
serves six

1 spaghetti squash
1/2 a yellow onion, chopped
1 clove garlic, minced
olive oil
butter
1.5 - 2 cups plain Greek yogurt (how much really depends on the size of the squash)
3 - 4 oz cheddar cheese, divided
salt and pepper to taste


Preheat your oven to 375. Cut your squash in half, scoop out the seeds, and place both halves, cut side down, on a cookie sheet. Bake for about 30 - 35 minutes, until you can easily pierce the skin with a fork. Remove from oven and let cool.

In a skillet, heat some oil and butter over medium and add your onion. Saute until golden and tender. Turn off the heat, add your minced garlic, and toss quickly to avoid overcooking the garlic.

May I just stop here and say that, whenever a recipe says to add the minced garlic WITH the other veggies right at the beginning,  you should IGNORE that advice? Because it never, ever works out that way. Minced garlic takes like 30 seconds or less to become fragrant. So, I love you, Detoxinista, but do not recommend cooking minced garlic on medium high for five minutes, because no.

Transfer your cooked onion and not-burned garlic to a medium bowl, and add the Greek yogurt and about 2 - 3 oz of the cheddar. Stir this up and then fork out the spaghetti squash tendrils into the bowl. Mix all this stuff up very well, and season with S&P.

Dump the concoction into a casserole dish and smooth the top with a spatula. Sprinkle the rest of your cheese on top and oh for pete's sake just go grab another small handful because the lack of potatoes saved you about 389578467 calories.

Return to the oven and bake about 30 minutes, until the top is golden brown and full of heaven and puppies and promises of money. EAT.

This dish is so good, and is perfectly reheatable for leftovers the next day. YUM.


Sunday, January 6, 2013

Kale Chips

So this whole paleo thing is tricky! I planned my meals accordingly but then I was like oh shit, I can't snack on crackers or cheese anymore, so what the hell. Chips are out. English muffins are out. Alexandra's leftover mac and cheese is OUT. So I went to Paleo Plan and found a lot of tasty recipes, not just for meals but also for snacks. One of them was kale chips and by golly, these were easy and not nearly as disgusting as I thought they'd be.


Kale Chips

1 bunch kale
1 tsp olive oil
1 tsp sea salt

Preheat oven to 350. Wash kale and pat dry, and cut into 2" - 3" pieces, removing tough stems (I actually bought a bag of pre-washed, pre-cut kale from Trader Joe's, but it still had the stems, which are definitely not tasty).

Place kale in a bowl and drizzle with olive oil and sprinkle with salt. Toss to coat fully. Deposit kale onto cookie sheet and sort of shake the sheet to spread the kale out. Bake ten minutes or until crispy. And you're done!

I will say that some of the bitterness was still there in some of the leaves, so next time I will also season with some spices, like maybe chili powder and cumin, or ginger and curry, something like that. Maybe even just some good old 21 Seasoning Salute from Trader Joe's. Also, since brussels sprouts and asparagus are too bitter and pungent for me, I could just be a little more sensitive to the bitter flavor of kale.

All in all though, a way healthier alternative to potato chips and it was quick and easy.

Thursday, November 22, 2012

Roasted Veggies.


Look at those gorgeous things.

Roasted Veggies
2 - 4 side servings

1 sweet potato, peeled and diced small
1 zucchini, halved lengthwise and cut into thick chunks
1/2 green bell pepper, diced thick
8oz small white mushrooms
1 parsnip, peeled and diced small
1 handful baby carrots, diced
1 small handful sun-dried tomatoes
5-6 cloves garlic, halved
olive oil
salt and pepper
pinch red pepper flakes

Set oven to 375 and pop this dish in for about 30 minutes. YUM

Wednesday, October 10, 2012

Cauliflower Crust Pizza.

Um, YES YOU READ THAT RIGHT. Hey low-carb, no-carb people out there? This is the stuff for you. I got the recipe here:  Recipe Girl but naturally I made a few changes, so here we GO

Cauliflower Crust Pizza

1/2 head of a large cauliflower
1 large egg
1.5 cups shredded mozzarella
Garlic powder
Oregano
Pasta Sauce
1/4 cup mozzarella
1/2 cup sauteed mushrooms
3-4 fresh basil leaves (optional)
1/4 cup shredded chicken or crumbled bacon


Preheat oven to 450. Using a food processor or, like recipe girl did, a grater (gives me shivers, I always grate my fingers), get your cauliflower into small crumbles. I mean, real small.

Put them in a large bowl and microwave them 8 - 10 minutes. Mix into the cauli the egg, 1.5 cups cheese and herbs. Stir to thoroughly mix, until it starts clumping really nicely. Pour it onto a sprayed cookie sheet.


Now, pat the mixture into a round.


Pop that puppy in the oven for about 15 minutes, until nice and golden. Use that time to prep your toppings:


Time to remove! Set the oven to broiler now.


Now for toppings. Sauce...


Cheeeeeeeese...


And all the other good stuff!


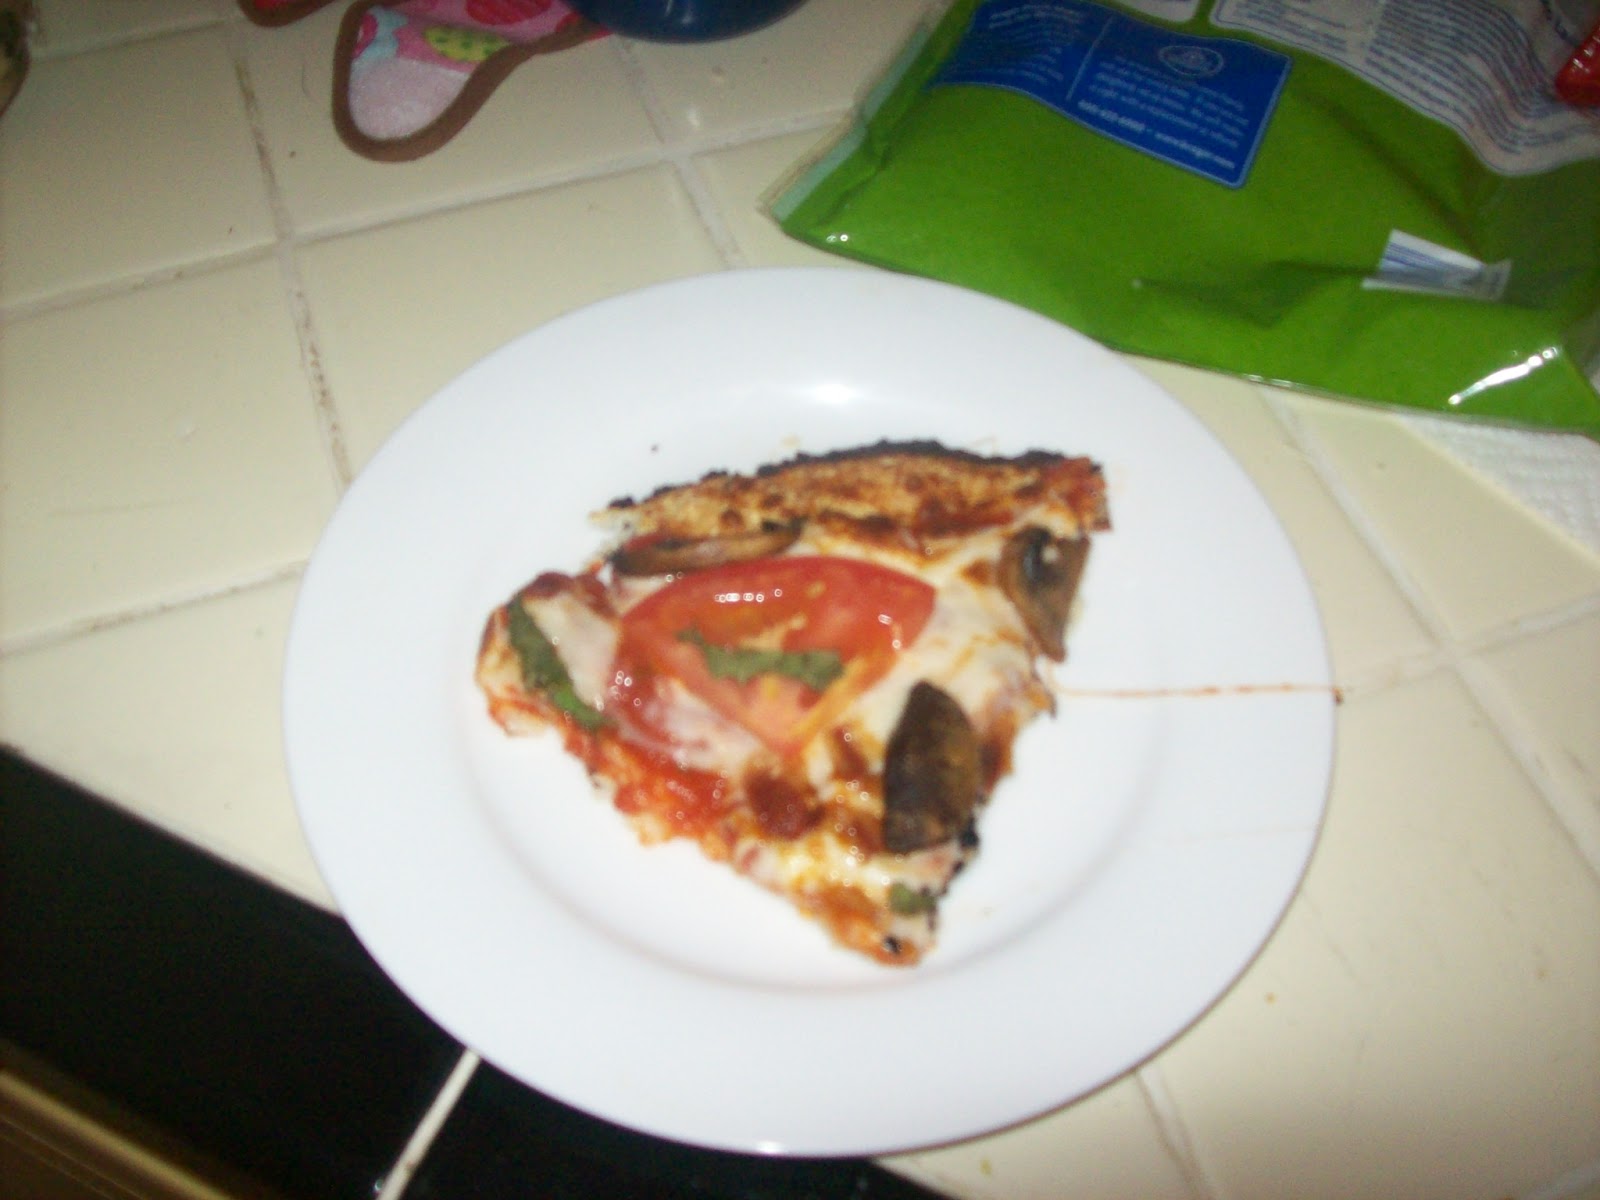
It only needs to sit under the broiler for 3 minutes or so. Certainly not as long as 5 minutes. Remove and let cool. I put mine, stupidly, on the oven which was of course quite hot. But when I did the second pizza, I set it on the counter and it really stuck together like pizza! Here is a slice of the first pie:


It was absolutely delicious but it sort of fell apart. It was all because I didn't let it cool. See what I mean?


But when I let the second pie cool, at least 10 minutes, it slid around on the sheet like it was born for it. I could pick up a slice in my hands just like a regular pizza slice. Anyways, the important part is that, regardless of whether it was fork and knife pizza or handheld pizza, both pies were ABSOLUTELY DELICIOUS.

And completely worth the mess:


And dishes.


Besides, I know one way to help ease the kitchen clean up blues.


Enjoy!

Monday, September 10, 2012

Broccoli Fritters!!

These are so good, I just... I am having a hard time explaining just how delicious, just how decadent these taste, and all there are is a lot of broccoli, some flour and some parmesan. So easy, and actually rather fun.

I got the recipe from Smitten Kitchen and considering how beautiful the photography is on that site, I'm rather glad I didn't take shitty pictures of my own cooking experience. Please feel free to ditch this post in favor of the SK one. But I did make some small tweaks between my first attempt and my second, and the second was a lot better.

Broccoli Fritters
makes 4 side servings

18oz raw broccoli florets, trimmed to about 1" size, stems discarded
1 large egg, lightly beaten
2/3 cup finely shredded parmesan
1 cup all purpose flour
1 pinch red pepper flakes
salt and pepper to taste
Olive oil
Vegetable oil

Lightly steam your broccoli florets. They should be quite tender but not super mushy. As they're cooling, add your beaten egg, parmesan, flour, pepper flakes and S&P to a large bowl.

Add your broccoli on top and with a potato masher (or a meat tenderizer in my case), smash your broccoli up. Now, Smitten Kitchen suggests mashing them a bit, "leaving the pieces recognizable" but I found, on my second try, that mashing them a bit further was A-OK.

Once the broccoli is mashed, start mixing it with the ingredients below until it's nice and chunky. Thoroughly mixed, you know the drill. Now, put a heavy skillet (think cast iron) over medium high heat and add, as Smitten Kitchen puts it, a good slick of oil in there. Just enough to thoroughly coat the bottom of the skillet.

When your skillet is ready, which you can test with a few drops of water, take about two tablespoons' worth of broccoli mix and form a small patty. My friend Kendra did this expertly with her hands, much like you would a hamburger patty.

I want to pause here and say that the second go round my broccoli mix was far less sticky than the first time (I had followed SK's measurements to a T; I think doubling the recipe + 2 more ounces of broccoli really helped the consistency). So if you're going by SK's recipe, I think adding a wee bit more broccoli and mashing it up a bit more may help.

ANYWAYS. Now, add about four patties to the skillet at a time. After just a few minutes, they'll be ready for a flip. Once both sides are a nice golden brown, remove to a paper towel-lined plate to drain as you cook the rest of them.

A great sauce for dipping can be simple ranch dressing, or, if you add a generous amount of both chili powder and paprika to plain, non-fat yogurt, that my friends is a tangy deliciousness you'll not soon forget.

I really hope you go out and try these. They were SO delicious, we had them Friday night with steak, Saturday night with ribs, and tonight we're having them with some baked chicken breasts.

Tuesday, August 14, 2012

French Potato Casserole!!


There was a bit of drama when I set out to make this recipe. See, after my brother and sister in law had their baby, Alora, Todd, Alex and I went over and brought some food. I brought stuff to make a main dish casserole for them to enjoy at a later date, and then I brought a recipe and the fixings for this here potato casserole. I had forgotten to bring my mandolin then, but I did remember the recipe.

Cut to a few weeks ago when I made this dish. I had it all set up to go, but I couldn't find my recipe. I figured I had left at it Scott and Amery's despite calling Amery and having her say lol, no, I gave it to you. Then I figured I had lost it FOREVER in transit.

It's from Cook's Illustrated, so I went to their website. I was justifiably outraged when they demanded I sign up for a free 14 day trial period, complete with submission of a credit card number. I JUST WANT MY RECIPE. I already give those bastards my money and so I was piiiiissed.

Luckily I found it on another blog, and after a nasty email sent off to Cook's, I was able to get started. And then Sunday I found my recipe, nestled between two cereal bowls in the cabinet. I keep some of my cookbooks, plus my recipe box, in the cabinet so it wasn't a total senior moment, but still, not my finest.

I have made changes to the recipe. For example, it calls for bacon, but I frequently skip it for time, fat content and due to the fact that we always have meat for dinner. It feels like a Jim Gaffigan skit if I add more meat. Let's add some meat to our meat so we don't starve. This meat is pretty bland, could we add some meat to it? Although I've been known to wrap chicken breast in bacon and bake it so I guess I just hypocrite bitch slapped myself? I DON'T KNOW. For the original recipe, this blog does it.


Hearty French Potato Casserole
serves 2 - 4 as a side dish

Total time: 1 hour - 1 hour 15 minutes
1 whole onion, sliced
2 large potatoes, sliced thin
1 large zucchini (about 8oz), sliced thin
1 tsp Penzeys Parisien spices blend (optional)
1 tsp dried thyme
Black pepper to taste
1 cup chicken broth
1 cup beef broth
2 tbsp butter

Preheat oven to 425. In a saucepan over medium heat, cook onions in either oil or butter, your choice. If they brown up too quickly, or if the bottom of the pan gets too brown, add bits of water to loosen it all up. 


Surprisingly, or maybe not surprisingly for all you geniuses out there, the onions will take about 20 minutes. Use your time wisely, as my fourth grade teacher, Mr. Christie, would tell us. I made fortune tellers. So now, let's slice up our veggies. I used a mandolin because AWESOME, and TIME SAVER and BLURRY PHOTO.


Check that out! I could have actually set the mandolin to slice then a wee bit thinner but we're rolling with it.


Hey there, innuendo!


All right, now the veggies are sliced.


If you're lucky, you will have a kitchen helper who is more interested in the light switch than whatever it is you're doing.


Let's check those onions. Yummy looking!


So here is the delicious Parisien spice blend I got as a party favor at Kendra's bridal shower. SO GOOD.


Thank you for your thyme...


Now, add those spices, plus black pepper, and your delicious onions to the sliced veggies in a big bowl and toss to coat. It's sort of a pain because the potato slices are like a new deck of cards and the slices stick together.


Now for the "broths" or, as I like to call them, my bouillon sources: The Wyler's maybe be powdered, but it is sodium free which helps balance the sick amount of sodium in the low-sodium version of Better Than Bouillon's beef base.


Mix up your bouillon with the water and put it all together in the onion skillet until it is simmering. Meanwhile, arrange your veggies. I like to do potatoes, onion, zucchini, onion, and then top with the potatoes. The idea of those delicious onions drying out makes my heart ache. Ah, look! My helper has arrived.


Why yes, they DO look like worms! Anyways, now for the zucchini layer...


Onion layer...


And the final potato layer, complete with victorious stab of a measuring spoon in a grubby little hand. As I type this, my baby is on her way to her first swim lesson. I die a bit. Todd better take photos. Anyways, press down firmly to make sure the casserole is more or less evenly layered. This is most important in the corners which can tend to be less full, if that makes sense. Sorta slide stuff around to get it all nestled.


Now for the broth. I said two cups but what you really need is just enough to sufficiently cover, but not completely drown, your layers. Like so:


Does she ever wash her pyrex dishes, Jesus! Now for the mega part! THE BUTTER. Make sure to evenly dot the casserole.


It takes about 45 minutes in the oven, but once you're done, let it sit out for about 15 minutes. As you walk by the dish, try not to eat the top potatoes. Oh fuck it! EAT THEM ALL, they're halfway between scalloped and potato chips, and they are to die for!


Look at that deliciousness!


BOOOM, as I like to say to Kendra when I score 60 points on a word in Words With Friends. BOOOM!

Friday, May 11, 2012

Root Veggie Hash Browns

So I got this Root Veggie Cakes recipe fom Cosmopolitan Primal Girl and while it didn't turn out as expected, it still made for one hell of a side dish. If you're trying to avoid starchy carbs, this is an excellent alternative to hash browns. And, I feel like if I had squeezed the absolute last drop of moisture from the shredded veggies, and added whole eggs instead of just yolks, AND refrigerated the patties for like an hour before putting them in the skillet, they would have turned out. Anyways, here is the recipe:

Root Veggie Cakes/Hash Browns

Ingredients:
- 1 large (or 2 small) celery root – outer skin/knobs removed
-  3 large carrots or 12 baby carrots – peeled (if regular carrot)
- 3 parsnips – peeled
- 1/2 Cup parsley – chopped
- 1/2 red onion
- salt and pepper
- 1 Tbsp coconut oil
- 2-3 egg yolks

Directions:
1. Grate all the root veggies and onion in the food processor.
2.  Mix them together with the parsley and salt/pepper in a bowl.
3.  Add the egg yolks…start with 2 and then add a 3rd if needed.  You should be able to mould the mixture into patties and if it is not sticking together, add another egg.
4.  In a large skillet, heat the coconut oil.  Also, heat your oven to 375.
5.  While the pan is heating, make patties with the root veggie mixture.  Squeeze out the excess moisture while you are shaping them.
6.  Fry them in the skillet for about 2 minutes per side, until they are brown.
7.  Transfer them onto a parchment paper lined baking sheet and pop them in the oven for about 10-15 minutes.  This helps to finish cooking the veggie all the way through.
8.  Enjoy!


So here is how it went for me.

Grate all the veggies and onion in a food processeor, mix with parsley, salt and pepper:


Add yolks, and due to it not sticking well, add another one. Form patties, which are so dangerously loose that the moment they hit the skillet, you begin to freak out. You call in your honey badger husband to do the flipping for you.


It goes somewhat all right for the first two.


And then all hell breaks loose and instead of three big patties you have three separate piles of grated vegetable.


Yeah. So then you just run with it.


You add some Cholula:


Toss and flip to evenly mix...


Sprinkle with Parmesan and eat the hell out of it.


Don't you adore my messy counters? God I need to get some photography skills, and I need to stop talking about it in every photo post.

Oh, the meat portion, which is dwarfed by the epic amount of root veggies, is stuffed chicken breast that Todd made on the grill in foil packets.

Thursday, April 26, 2012

Zucchini Noodles!


They're so easy, especially if you have a mandolin with a julienne blade on it. If that's the case, then you just slice them lengthwise, but be sure to use the hand guard because HELLO, that would be bloody.

If you don't, you could use a vegetable peeler and make long flat zucchini "ribbons" and then stack them up and slice them into noodles.

I made these noodles last night, and then did the same with two potatoes. I rinsed them, then added them to a skillet with a bit of olive oil.


I like to add some water whenever I do hash browns or home fries. It quickens the process and keeps them from over-browning. Chicken broth is delicious as well. When the potatoes were basically finished, I then added my zucchini noodles.


Yum! We had these last night with that pork tenderloin and maple juices recipe I blogged about not too long ago. They soaked up the excess sauce and with a bit of parmesan added, they were absolutely divine. We're having pad thai tonight and I can't wait to sub the rice noodles with zucchini.