Labels

Adama (3) appetizers (5) beauty (7) beef (6) birthday (2) books and writing (14) busy body home life (140) chicken (29) crappy crafting (10) current events (1) dessert (2) drinks (9) fitness (62) food (127) holidays (11) lamb (1) life hacks (1) lists (12) me (39) med (1) media (33) oh baby (117) one-dish (26) paleo (7) pasta (9) pets (38) phone (2) pork (11) randoms (8) raves and reviews (55) salad (4) seafood (19) sick (3) side (1) sides (14) snacks (4) sorrow (3) soup (9) todd (3) travel (7) veggie (23) weather (16)
Showing posts with label sides. Show all posts

Friday, October 4, 2013

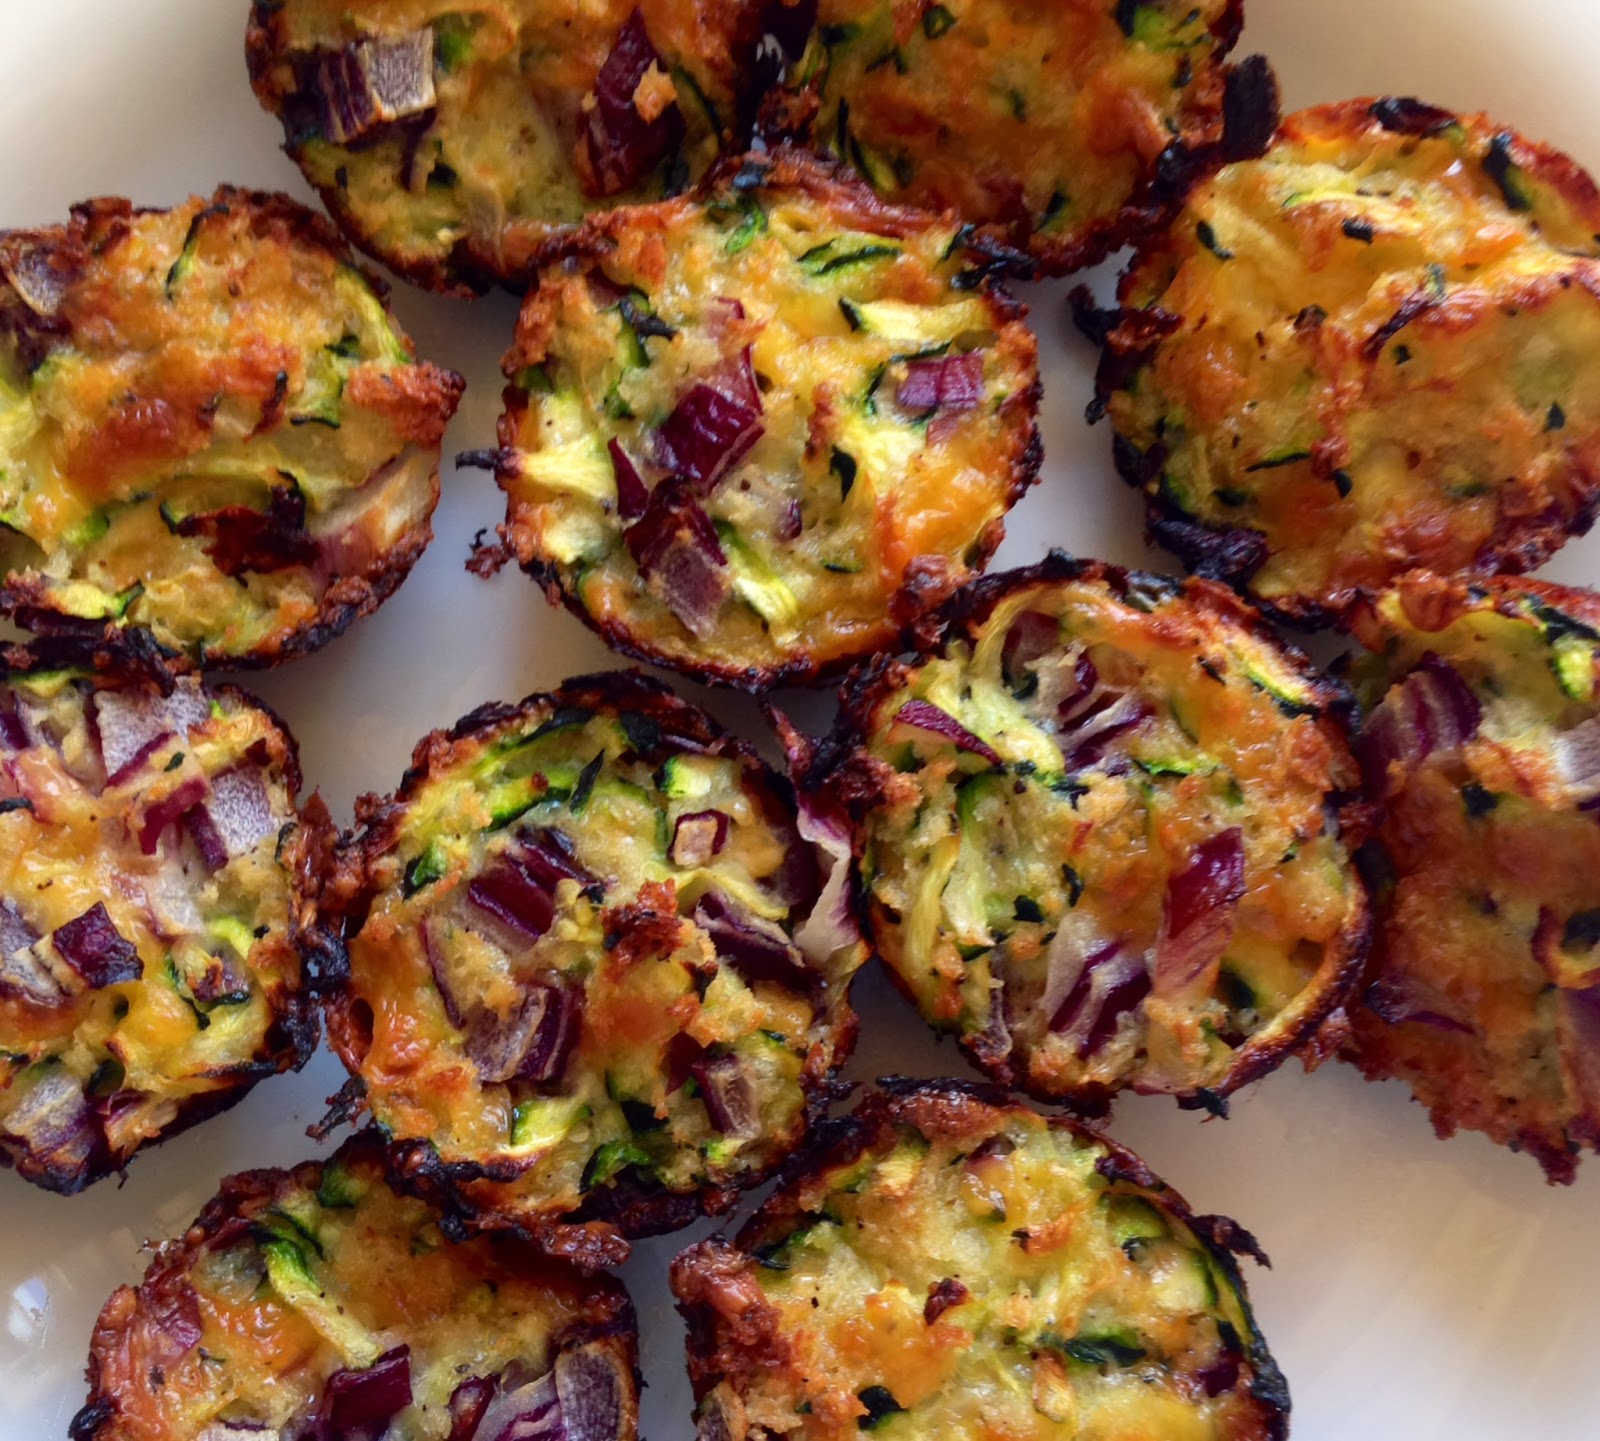
Zucchini Tots


You know it's a good recipe when after taking one bite you pick up your phone and text two friends about it. That's what happened this past Wednesday after I attempted the first batch of these delicious little devils. I have two friends, Kendra and Amber, who have zucchini in their gardens and are always looking for new things to do with the prolific courgette. These are absolutely perfect.

The only issue for some people is that they call for a mini muffin tray. Totally worth the purchase, for this recipe alone. Anyways, I found this on Pinterest but made some tweaks, so here goes.

Zucchini Tots
makes 24 (serving size is three, supposedly)

2 large zucchini
1/2 cup panko
2/3 cup shredded cheddar
1/3 cup finely diced red onion
2 large eggs
Garlic powder, to taste
Trader Joe's 21 Seasoning Salute, to taste (AKA go batshit crazy)

Preheat oven to 400 degrees. Spray a mini muffin pan with cooking spray, or grease with butter. HAVE FUN WITH IT FOLKS.

Grate your zucchini using the large size on your box grater. This goes so quickly and easily, even for accident prone moi, that I don't recommend lugging out the foot processor and fitting it with the grating tool.

Take a clean, thin but durable dish towel (mine tore) and use it to squeeze out all the moisture from the zucchini. This takes several twists and squeezes.

Add all the ingredients, pell-mell style, in a large bowl and stir to thoroughly mix everything together. Fill each of the muffin cups to the top, pressing down to make sure they hold together when you remove them.

Bake about 18 - 20 minutes, until the tops are golden. Now, the original called for 16-18 but in my notoriously, infamously over-hot oven, it still needed at least 18 minutes. Plus, at the halfway mark I turned the pan around to make sure everything was even.

For those of you 1%ers who have convection ovens then WHATEVER man.

After they're out of the oven, I recommend popping them out and serving soon after, so long as you take care not to burn yourself. They're amazing cold and warm, but nothing beats them when they're hot.

Easy to reheat and to freeze, they are just amazing. I think they're better than tater tots thanks to all the yummy ingredients, but maybe I'm crazy.

Enjoy! They rock with a little bit of ketchup as a side to a delicious grilled steak.

Tuesday, September 17, 2013

Randoms, I guess.

I have so many smallish things I'd love to talk about so I guess I'll just file them together in a mishmash of a randoms post.

1. Pinterest has been treating me well lately. On Sunday I made two recipes, balsamic pork and the accompanying green beans with olives, sun dried tomatoes and pine nuts that is linked to in that pork recipe. Both were smash hits and also very easy, and I know they will be regular features in my fall recipe portfolio.

Portfolio! Miss Piggy! Lady Holiday!!!

Aside from those, you'll recall my latest food post, the Israeli couscous with chicken and peas. So good! And before that, I made an absolutely delicious chicken yakisoba and a great garlic dijon salmon too. So, yeah. Pinterest has been delighting me lately.

So has Epicurious!

Epicurious is a great app I have on my iPhone, and I've so far gotten two great recipes from it, a grilled butterflied leg of lamb recipe that Todd absolutely knocked it out of the park, and just last night I made chicken with a sauce originally tied to Chilean sea bass. Supremed lemon wedges, kalamatas, rinsed capers, oregano and olive oil on top of pan seared chicken tenders. It was delightful!

P.S. I now know how to supreme a lemon.


2. BREAKING BAD.

Okay, so I can't talk much about it because Todd and I literally JUST started it two nights ago, and are only into the fourth episode. But holy shit! I know we're late to this party considering there are only two episodes left, and I'm scared of the internet after that because I will likely get spoiled on so many things, but I'm glad we finally bit the bullet, took the plunge, got off the dime, etc.

And I'm so impressed by the acting. Bryan Cranston is a genius, and Aaron Paul deserves the role that he got extended. Apparently his character was supposed to get killed off in the first season, but the powers that be loved Paul's job so much that they made him a permanent character. That is a testament to his acting skills.

I have this weird urge to spoil myself on basically EVERYTHING I get into. I did it with the books The Pillars of the Earth and World Without End, and a slew of other books too. I do it with all the shows I watch, scouring the internet for tidbits and rumors, or reading the wiki pages of TV series that are no longer playing so I can read ahead and keep myself in the story without having to wait until Alex goes to bed that night to get back into that world. I become obsessed with and starved for new worlds that are created for me and other readers/viewers to enjoy.

But not now. Oh, no. I'm not spoiling myself for this show. And that is very, very weird.


3. Exercise, man. So it is very, very true that it takes just 12 weeks of inactivity to lose all progress in a particular sportt or exercise. I all but quit biking during the summer. After a bike ride in 108 degree heat that had me nearly vomiting after just seven miles (with three left to go), I locked up my dad's bike for the season.

At that time, I had whittled my time down to 48 minutes for a 10.25 mile ride. Once I think I even got it down to 46. Well, for the past two, maybe three weeks I've been biking again and my God man, my time is so sucky. Consistently at 52 minutes and yesterday was even worse, clocking it at 57 minutes. WHAT THE HELL MAN. I was prepared for some set backs but to lose nine minutes on my time? Gross.

I'm glad summer is coming to an end, even though we'll hit 100 at least once more this week (who knows what next week has in store), because I'm ready for more moving around outside. Even the dog walks stopped, thanks to the heat and my plantar fasciitis. Oh, those HIIT workouts? Can't do them if they include any sort of explosive jumping movements. They murdered my feet worse than a weekly run did. So when I do my strength workouts, all movements have to have my feet planted firmly on the floor, save for walking lunges (which I still have to do slowly, carefully).

These past two weeks have seen a return of both bike rides and dog walks, for which I'm grateful. It feels good getting back into my regular routines again. I think it will be good for Alex, too.


4. Alex's potty woes have for the most part abated, I'm delighted to say. Wow. That trip to San Diego really and truly threw one hell of a wrench into things. Her sleep is still a liiiittle wacky (still requiring lights to fall asleep), but she's back in underpants and I'm back to being happy. Just like incorporating dog walks back into our routine, I see things are settling for her, that she's getting back into the swing of things. It's taken over three weeks, but it's happening.

I know everyone is different when it comes to parenting styles but this little glitch in the system proves to me how children thrive on routine, rules and parameters for everyday stuff. That's not to say it isn't good to shake it up every now and then to strengthen them and prepare them for a life that is more chaos than control, but it did show me that a happy kid is one who knows, for the most part, what's coming down the pike for them in their little worlds.

And it shows me that taking a vacation three weeks after potty training is insane.

Monday, April 29, 2013

Parmesan-Panko Zucchini Fries

So! We had these with our burgers last night and my goodness they were tasty. My only problem was that I should have salted the zucchini before breading them. The recipe I had used did actually suggest salting both the flour and the egg. So that's what I am going to do next time.


Parmesan-Panko Zucchini Fries

3 zucchinis, trimmed
1/4 cup flour
salt and pepper, to taste
2 eggs, beaten
Panko breadcrumbs
About 3/4 cup Parmesan
2 tbsp dill
olive oil spray

Preheat oven to 425 (my oven runs hot so I did 400) and position a rack to the center of the oven. Line a cookie sheet with parchment paper and set aside. In a big bowl, add the flour, a generous amount of salt and a bit of pepper. In another bowl, put your beaten eggs and in another bowl, put the Parmesan, Panko and dill and mix thoroughly.

Cut the zucchinis crosswise in the middle and cut each half into eight wedge sticks. Add all the zucchini sticks to the big bowl with flour, and toss around to make sure each is coated. Shake off excess flour and dip your zucchini fries into the egg, then roll in the Panko-Parmesan mixture.

Line the fries up as shown in the photo, spray with the olive oil spray and bake for 15 minutes. To ensure even cooking, at the 15 minute mark turn your pan around and cook another 10 - 12 minutes (again, my oven runs hot so they were done at 10 minutes).

Enjoy!

Friday, February 22, 2013

Holy Hash Browns, Batman!

Did I just say hash browns? I sure did! JUST LOOK:


Yes, yes, it's an artless photo, but look past that and focus on the crispy crunchy cheesy crust on that bad boy. BUT WAIT. Aren't I on a low carb diet? Why yes I am! So it may shock and horrify you to learn that this hash brown casserole is actually comprised of spaghetti squash! Not a potato in site! PHENOMENAL. I got this recipe from Detoxinista and, like all the other recipes I've tried, it was just delicious. AND HEALTHY.

Cheesy Spaghetti Squash Casserole
serves six

1 spaghetti squash
1/2 a yellow onion, chopped
1 clove garlic, minced
olive oil
butter
1.5 - 2 cups plain Greek yogurt (how much really depends on the size of the squash)
3 - 4 oz cheddar cheese, divided
salt and pepper to taste


Preheat your oven to 375. Cut your squash in half, scoop out the seeds, and place both halves, cut side down, on a cookie sheet. Bake for about 30 - 35 minutes, until you can easily pierce the skin with a fork. Remove from oven and let cool.

In a skillet, heat some oil and butter over medium and add your onion. Saute until golden and tender. Turn off the heat, add your minced garlic, and toss quickly to avoid overcooking the garlic.

May I just stop here and say that, whenever a recipe says to add the minced garlic WITH the other veggies right at the beginning,  you should IGNORE that advice? Because it never, ever works out that way. Minced garlic takes like 30 seconds or less to become fragrant. So, I love you, Detoxinista, but do not recommend cooking minced garlic on medium high for five minutes, because no.

Transfer your cooked onion and not-burned garlic to a medium bowl, and add the Greek yogurt and about 2 - 3 oz of the cheddar. Stir this up and then fork out the spaghetti squash tendrils into the bowl. Mix all this stuff up very well, and season with S&P.

Dump the concoction into a casserole dish and smooth the top with a spatula. Sprinkle the rest of your cheese on top and oh for pete's sake just go grab another small handful because the lack of potatoes saved you about 389578467 calories.

Return to the oven and bake about 30 minutes, until the top is golden brown and full of heaven and puppies and promises of money. EAT.

This dish is so good, and is perfectly reheatable for leftovers the next day. YUM.


Thursday, November 22, 2012

Roasted Veggies.


Look at those gorgeous things.

Roasted Veggies
2 - 4 side servings

1 sweet potato, peeled and diced small
1 zucchini, halved lengthwise and cut into thick chunks
1/2 green bell pepper, diced thick
8oz small white mushrooms
1 parsnip, peeled and diced small
1 handful baby carrots, diced
1 small handful sun-dried tomatoes
5-6 cloves garlic, halved
olive oil
salt and pepper
pinch red pepper flakes

Set oven to 375 and pop this dish in for about 30 minutes. YUM

Monday, September 10, 2012

Broccoli Fritters!!

These are so good, I just... I am having a hard time explaining just how delicious, just how decadent these taste, and all there are is a lot of broccoli, some flour and some parmesan. So easy, and actually rather fun.

I got the recipe from Smitten Kitchen and considering how beautiful the photography is on that site, I'm rather glad I didn't take shitty pictures of my own cooking experience. Please feel free to ditch this post in favor of the SK one. But I did make some small tweaks between my first attempt and my second, and the second was a lot better.

Broccoli Fritters
makes 4 side servings

18oz raw broccoli florets, trimmed to about 1" size, stems discarded
1 large egg, lightly beaten
2/3 cup finely shredded parmesan
1 cup all purpose flour
1 pinch red pepper flakes
salt and pepper to taste
Olive oil
Vegetable oil

Lightly steam your broccoli florets. They should be quite tender but not super mushy. As they're cooling, add your beaten egg, parmesan, flour, pepper flakes and S&P to a large bowl.

Add your broccoli on top and with a potato masher (or a meat tenderizer in my case), smash your broccoli up. Now, Smitten Kitchen suggests mashing them a bit, "leaving the pieces recognizable" but I found, on my second try, that mashing them a bit further was A-OK.

Once the broccoli is mashed, start mixing it with the ingredients below until it's nice and chunky. Thoroughly mixed, you know the drill. Now, put a heavy skillet (think cast iron) over medium high heat and add, as Smitten Kitchen puts it, a good slick of oil in there. Just enough to thoroughly coat the bottom of the skillet.

When your skillet is ready, which you can test with a few drops of water, take about two tablespoons' worth of broccoli mix and form a small patty. My friend Kendra did this expertly with her hands, much like you would a hamburger patty.

I want to pause here and say that the second go round my broccoli mix was far less sticky than the first time (I had followed SK's measurements to a T; I think doubling the recipe + 2 more ounces of broccoli really helped the consistency). So if you're going by SK's recipe, I think adding a wee bit more broccoli and mashing it up a bit more may help.

ANYWAYS. Now, add about four patties to the skillet at a time. After just a few minutes, they'll be ready for a flip. Once both sides are a nice golden brown, remove to a paper towel-lined plate to drain as you cook the rest of them.

A great sauce for dipping can be simple ranch dressing, or, if you add a generous amount of both chili powder and paprika to plain, non-fat yogurt, that my friends is a tangy deliciousness you'll not soon forget.

I really hope you go out and try these. They were SO delicious, we had them Friday night with steak, Saturday night with ribs, and tonight we're having them with some baked chicken breasts.

Tuesday, August 14, 2012

French Potato Casserole!!


There was a bit of drama when I set out to make this recipe. See, after my brother and sister in law had their baby, Alora, Todd, Alex and I went over and brought some food. I brought stuff to make a main dish casserole for them to enjoy at a later date, and then I brought a recipe and the fixings for this here potato casserole. I had forgotten to bring my mandolin then, but I did remember the recipe.

Cut to a few weeks ago when I made this dish. I had it all set up to go, but I couldn't find my recipe. I figured I had left at it Scott and Amery's despite calling Amery and having her say lol, no, I gave it to you. Then I figured I had lost it FOREVER in transit.

It's from Cook's Illustrated, so I went to their website. I was justifiably outraged when they demanded I sign up for a free 14 day trial period, complete with submission of a credit card number. I JUST WANT MY RECIPE. I already give those bastards my money and so I was piiiiissed.

Luckily I found it on another blog, and after a nasty email sent off to Cook's, I was able to get started. And then Sunday I found my recipe, nestled between two cereal bowls in the cabinet. I keep some of my cookbooks, plus my recipe box, in the cabinet so it wasn't a total senior moment, but still, not my finest.

I have made changes to the recipe. For example, it calls for bacon, but I frequently skip it for time, fat content and due to the fact that we always have meat for dinner. It feels like a Jim Gaffigan skit if I add more meat. Let's add some meat to our meat so we don't starve. This meat is pretty bland, could we add some meat to it? Although I've been known to wrap chicken breast in bacon and bake it so I guess I just hypocrite bitch slapped myself? I DON'T KNOW. For the original recipe, this blog does it.


Hearty French Potato Casserole
serves 2 - 4 as a side dish

Total time: 1 hour - 1 hour 15 minutes
1 whole onion, sliced
2 large potatoes, sliced thin
1 large zucchini (about 8oz), sliced thin
1 tsp Penzeys Parisien spices blend (optional)
1 tsp dried thyme
Black pepper to taste
1 cup chicken broth
1 cup beef broth
2 tbsp butter

Preheat oven to 425. In a saucepan over medium heat, cook onions in either oil or butter, your choice. If they brown up too quickly, or if the bottom of the pan gets too brown, add bits of water to loosen it all up. 


Surprisingly, or maybe not surprisingly for all you geniuses out there, the onions will take about 20 minutes. Use your time wisely, as my fourth grade teacher, Mr. Christie, would tell us. I made fortune tellers. So now, let's slice up our veggies. I used a mandolin because AWESOME, and TIME SAVER and BLURRY PHOTO.


Check that out! I could have actually set the mandolin to slice then a wee bit thinner but we're rolling with it.


Hey there, innuendo!


All right, now the veggies are sliced.


If you're lucky, you will have a kitchen helper who is more interested in the light switch than whatever it is you're doing.


Let's check those onions. Yummy looking!


So here is the delicious Parisien spice blend I got as a party favor at Kendra's bridal shower. SO GOOD.


Thank you for your thyme...


Now, add those spices, plus black pepper, and your delicious onions to the sliced veggies in a big bowl and toss to coat. It's sort of a pain because the potato slices are like a new deck of cards and the slices stick together.


Now for the "broths" or, as I like to call them, my bouillon sources: The Wyler's maybe be powdered, but it is sodium free which helps balance the sick amount of sodium in the low-sodium version of Better Than Bouillon's beef base.


Mix up your bouillon with the water and put it all together in the onion skillet until it is simmering. Meanwhile, arrange your veggies. I like to do potatoes, onion, zucchini, onion, and then top with the potatoes. The idea of those delicious onions drying out makes my heart ache. Ah, look! My helper has arrived.


Why yes, they DO look like worms! Anyways, now for the zucchini layer...


Onion layer...


And the final potato layer, complete with victorious stab of a measuring spoon in a grubby little hand. As I type this, my baby is on her way to her first swim lesson. I die a bit. Todd better take photos. Anyways, press down firmly to make sure the casserole is more or less evenly layered. This is most important in the corners which can tend to be less full, if that makes sense. Sorta slide stuff around to get it all nestled.


Now for the broth. I said two cups but what you really need is just enough to sufficiently cover, but not completely drown, your layers. Like so:


Does she ever wash her pyrex dishes, Jesus! Now for the mega part! THE BUTTER. Make sure to evenly dot the casserole.


It takes about 45 minutes in the oven, but once you're done, let it sit out for about 15 minutes. As you walk by the dish, try not to eat the top potatoes. Oh fuck it! EAT THEM ALL, they're halfway between scalloped and potato chips, and they are to die for!


Look at that deliciousness!


BOOOM, as I like to say to Kendra when I score 60 points on a word in Words With Friends. BOOOM!
Friday, May 11, 2012

Root Veggie Hash Browns

So I got this Root Veggie Cakes recipe fom Cosmopolitan Primal Girl and while it didn't turn out as expected, it still made for one hell of a side dish. If you're trying to avoid starchy carbs, this is an excellent alternative to hash browns. And, I feel like if I had squeezed the absolute last drop of moisture from the shredded veggies, and added whole eggs instead of just yolks, AND refrigerated the patties for like an hour before putting them in the skillet, they would have turned out. Anyways, here is the recipe:

Root Veggie Cakes/Hash Browns

Ingredients:
- 1 large (or 2 small) celery root – outer skin/knobs removed
-  3 large carrots or 12 baby carrots – peeled (if regular carrot)
- 3 parsnips – peeled
- 1/2 Cup parsley – chopped
- 1/2 red onion
- salt and pepper
- 1 Tbsp coconut oil
- 2-3 egg yolks

Directions:
1. Grate all the root veggies and onion in the food processor.
2.  Mix them together with the parsley and salt/pepper in a bowl.
3.  Add the egg yolks…start with 2 and then add a 3rd if needed.  You should be able to mould the mixture into patties and if it is not sticking together, add another egg.
4.  In a large skillet, heat the coconut oil.  Also, heat your oven to 375.
5.  While the pan is heating, make patties with the root veggie mixture.  Squeeze out the excess moisture while you are shaping them.
6.  Fry them in the skillet for about 2 minutes per side, until they are brown.
7.  Transfer them onto a parchment paper lined baking sheet and pop them in the oven for about 10-15 minutes.  This helps to finish cooking the veggie all the way through.
8.  Enjoy!


So here is how it went for me.

Grate all the veggies and onion in a food processeor, mix with parsley, salt and pepper:


Add yolks, and due to it not sticking well, add another one. Form patties, which are so dangerously loose that the moment they hit the skillet, you begin to freak out. You call in your honey badger husband to do the flipping for you.


It goes somewhat all right for the first two.


And then all hell breaks loose and instead of three big patties you have three separate piles of grated vegetable.


Yeah. So then you just run with it.


You add some Cholula:


Toss and flip to evenly mix...


Sprinkle with Parmesan and eat the hell out of it.


Don't you adore my messy counters? God I need to get some photography skills, and I need to stop talking about it in every photo post.

Oh, the meat portion, which is dwarfed by the epic amount of root veggies, is stuffed chicken breast that Todd made on the grill in foil packets.

Thursday, April 26, 2012

Zucchini Noodles!


They're so easy, especially if you have a mandolin with a julienne blade on it. If that's the case, then you just slice them lengthwise, but be sure to use the hand guard because HELLO, that would be bloody.

If you don't, you could use a vegetable peeler and make long flat zucchini "ribbons" and then stack them up and slice them into noodles.

I made these noodles last night, and then did the same with two potatoes. I rinsed them, then added them to a skillet with a bit of olive oil.


I like to add some water whenever I do hash browns or home fries. It quickens the process and keeps them from over-browning. Chicken broth is delicious as well. When the potatoes were basically finished, I then added my zucchini noodles.


Yum! We had these last night with that pork tenderloin and maple juices recipe I blogged about not too long ago. They soaked up the excess sauce and with a bit of parmesan added, they were absolutely divine. We're having pad thai tonight and I can't wait to sub the rice noodles with zucchini.

Monday, April 23, 2012

Easy Party Recipes.

So we had Alexandra's 2nd birthday BBQ bash this past weekend, during which we forced our friends and family to mingle outside in 100 degree weather. But we installed a mister system and served a buttload of alcohol, so it was worth it.

We had some delicious sangria and jalepeno poppers, along with some hot dogs and a rice dish, and our awesome friends brought loads of delicious side dishes to help keep our parties recession-proof, as Charlie would say.

Since I'm still exhausted from this party of 50, and can't think of anything interesting to say aside from "My back hurts really bad," I figured I'd share a couple of recipes, namely for the sangria and the poppers.

Holy Sangria, Batman

4 bottles of red wine
4 bottles of white wine
1/2 bottle of Bacardi O
2 cans smashed pineapple, juice included
3 large oranges
3 lemons
2 limes
4 cups ginger ale

Add the first four ingredients in a giant receptacle. Using a knife, spiral-peel your oranges and cut up the fruit. Put both the peel and fruit chunks into the sangria. Cut your lemons and limes into wedges, give them a half-hearted squeeze over the sangria and toss them in, too. Refrigerate this stuff overnight. When you're ready to serve the sangria, add your 4 cups of ginger ale. Add a big ice chunk to keep it cold especially if it's going to sit outside all afternoon. Serve over ice. DELICIOUS.

Jalepeno Poppers

40 jalepenos
2 packages neufchatel
20 strips bacon, halved
Tin foil

Cut off the stem ends of the jalepenos and clean out the seeds and innards with a paring knife. Blink a lot cause the spice of the peppers definitely gets in the air. Once they're all clean, take a butter knife and use it to insert about a tbsp of neufchatel into each pepper. Then wrap half a bacon slice around the pepper and wrap that in a piece of tin foil. Put them on a hot grill for about 15 - 20 minutes. They will be temperature-hot as hell so definitely let them cool a bit before devouring.

THEY ARE SO GOOD.

Oh what the hell, here's another recipe.

I Have No Time Rice

1lb basmati rice
2 cans corn, drained
2 cans black beans, drained and rinsed

Cook the rice. Add the corn and beans. Top with salsa or hot sauce. DONE!

Wednesday, December 21, 2011

Salmon with Zucchini Scales (plus two Asian-inspired sides)

Ok, so there's this idea I once had. I wanted to basically re-scale salmon with veggies, and naturally zucchini came to mind. So I gave it a whirl, screwed it up the first couple of times, then perfected it into the dish you will be reading about tonight. And might I add, I made a great side dish that we're going to talk about too.

Salmon with Zucchini Scales with Rice
serves 2


1 12-16oz salmon fillet
Sesame oil, a drizzle here, a drizzle there
Sriracha, to taste
1 zucchini, sliced thinly
Garlic powder
Chili powder
1/2 cup basmati rice
1/8 cup sesame seeds

Ok, so I use a mandolin to slice the zucchini, and here's about how thin they should be. Actually, if memory serves correctly, they could stand to be even a sliver thinner. If that makes sense? Maybe thinner sliver? Sliver thinner, THINNER SLIVER! Now I'm just confused.

Anyways, here's what I did:


And apparently I didn't wash my hand first, and didn't give a crap that there was a small SLIVER of zucchini.

Ok, so now, drizzle some sesame oil on your salmon fillet, put a few sprinkles of sriracha and use a basting brush to spread over the entire fillet. Then tile the zucchini on top of it. Like so:


Now, drizzle a bit more sesame oil on top:


Then, sprinkle with the garlic and chili powder, which is essentially sriracha in dried form but who cares, I'm kind of into the overkill these days. Carefully dab a basting brush (plastic if you have it) to spread the oil all over. It will look something like this:


Now pop that puppy in the oven, set to 375, for about 25, 30 minutes. In the meantime, start cooking your rice and then....


Asian-style Veggies
Serves 2


1/2 bag of bean sprouts
10 baby carrots, quartered lengthwise
1/3 - 1/2 cup sun-dried tomatoes, SLIVERED
1 yellow squash, sliced and diced
Sesame oil

Put the veggies in a bowl, toss with some sesame oil and put in a skillet on medium high. If you don't like your veggies to have a bite to them, then saute the carrot SLIVERS first, then add the other veggies. And if you don't believe me about the sun dried tomatoes, then let go and dive into the foggy realm of faith, because damn, it's good. Anyways, cook your veg:


Now for the rice. Once your rice is cooked, grab your sesame seeds. Here's what I use:


Dump it in!


Now, lets put these three delicious delights together. First, remove your salmon:


I know it seems scary but just go for glory and cut that bad boy in half. It isn't even that hard! Look, few of the zucchini scales, if any, are super screwed up:


Now plate it up!


I have to be honest here, Todd and I were probably more blown away by the veggie mix than anything else. I've made this salmon dish dozens of times, but have never done this veggie combo. Add a sprinkle or two of sriracha and you've got a spicy little trio! Enjoy!

Wednesday, December 14, 2011

Super Side #2


Oooh, such a cliff hanger from yesterday! And now, two food posts in a row!


I know! Ok. So in order to get to the end of the green bean dish, we gotta get cracking on our delicious oven roasted potatoes. 

The same great thing about the green beans is also true for these potatoes: the first part can be done in advance. Indeed, I parboiled both tuber and bean one after the other, refrigerated them both and then completed the cooking processes that evening. Anyways, I'm talking too much.

Oven Roasted Potatoes
serves 2

3 small russet potatoes (the recipe usually calls for red skinned potatoes, but this is a recession-proof side dish)
1 tbsp butter
salt and pepper to taste
fresh rosemary (optional)

Dude, do you see how few ingredients you need for this epicness? Good, I'm glad. Because I took a lot of pictures of the steps and I'm in the mood to share.

Put water on to boil. Take your potatoes and wash them.


Peel those bitches! And, if you're like me, after you peel them you will either be sad that you neither own chickens to feel the scraps to, or the recipe for a potato peel pie:


Now you're going to halve the potatoes lengthwise, but do it down the skinny side, not the fat side. Observe, this is the bad side:


You want this side:


I know, it's subtle, but it makes a difference. So now we have our lovely halved potatoes:


Do you hear the subtle change in you heated water? That's because it's boiling! Yay! Slip the potatoes in along the side of the pot, to avoid painful splashing.


Now give it about seven to ten minutes depending on how big your potatoes are. I used small ones, so I give it seven minutes. Remember too, there will always be smaller, skinnier, shorter halves of the tubers so it's best to have the fatter ones be slightly underdone, than have the runts be absolute mush.

 Anyways, test the taters by pushing in a tooth pick. It sounds snotty and pretentious, but honestly, you'll know when it's just right. A little bit of resistance, but mostly a gently give when you push it in:


See the bits of mushy potato on the bottom of that spoon above? We're flirting with disaster here. Bring on the ice bath!


I'll admit it, I was horsing around, waiting for these damn potatoes to cook, so I stuck a small amount of ice water into the freezer. What you are looking at up there, is completely frozen. I put some more warm water in there, but the heat from potatoes was enough to thaw it. Long story short, don't be an asshole and freeze a small amount of ice water. It wastes time. Moving on: it's ice time.


Once the potatoes have zero warmth in their centers when you press them between your fingers, remove them from the ice, pat them dry on a clean dish towel and, if you're doing this in advance, stack them between layers of paper towel and put them in the fridge:


And cover them up, pop them in the fridge, and take a disco nap:


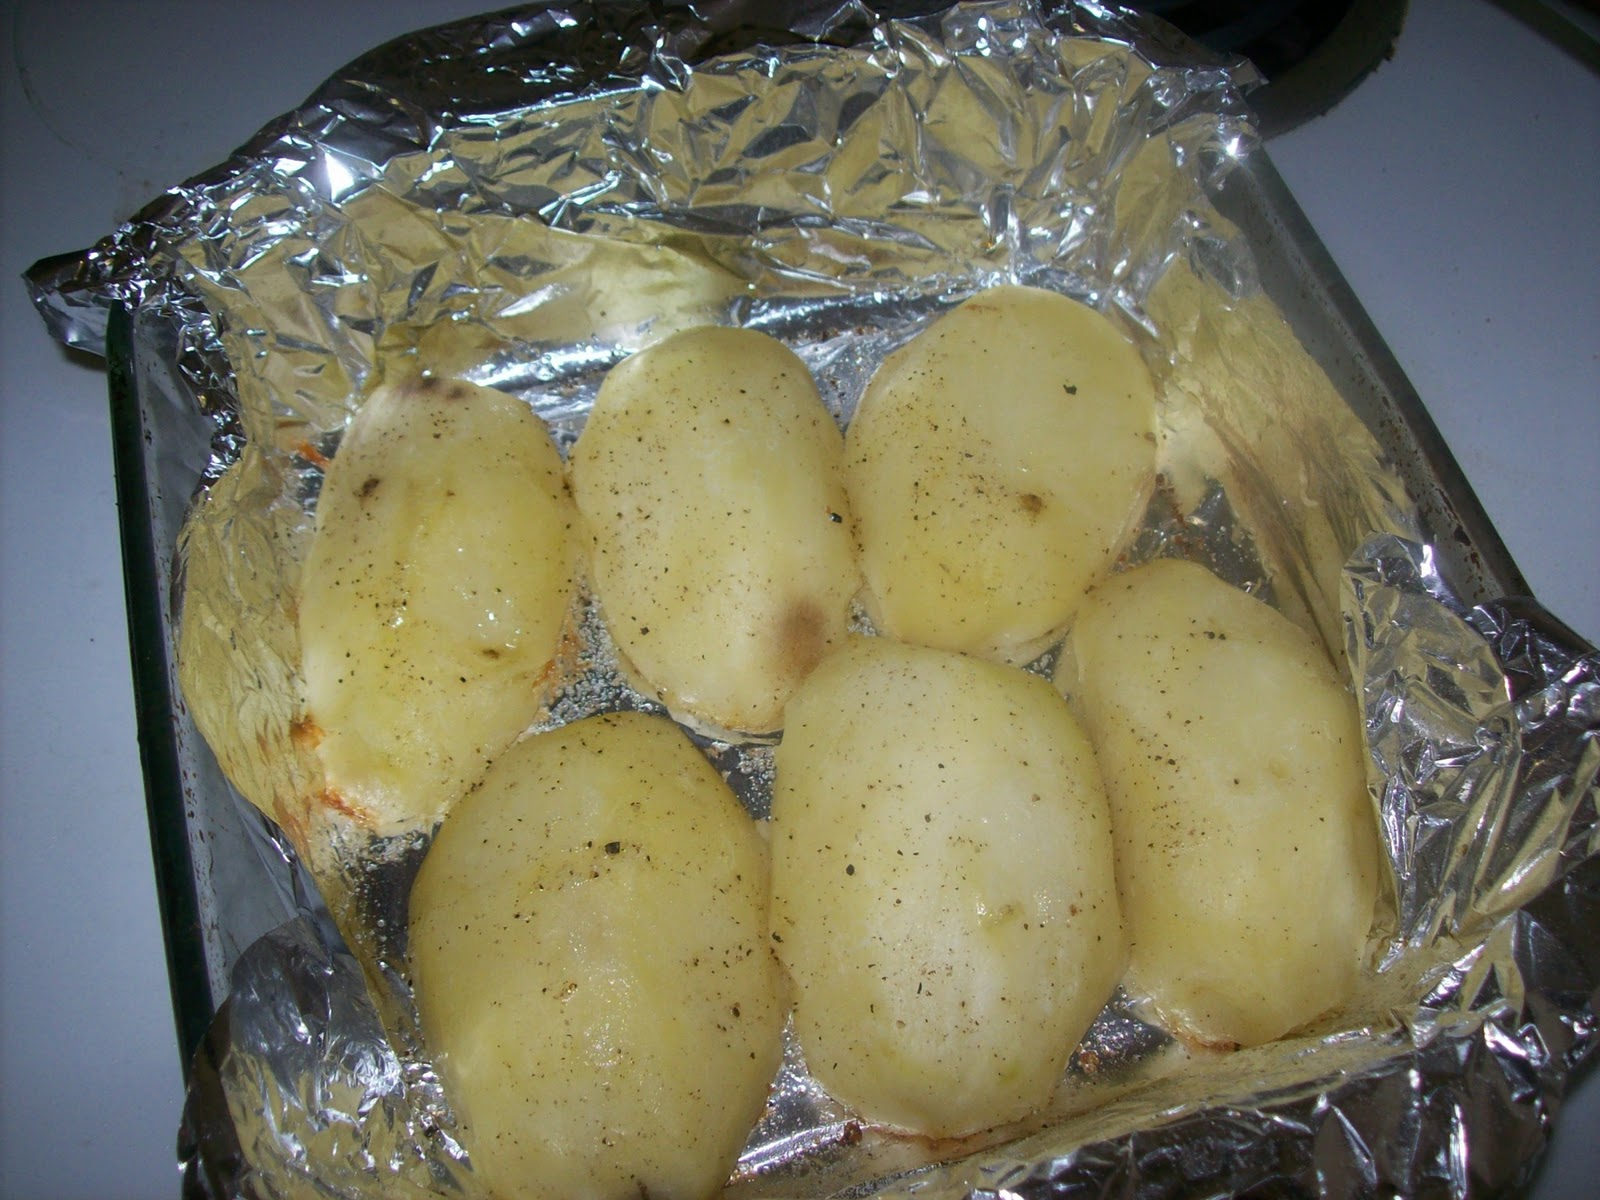
But if you want to cook them right away, set the oven to 375 and, after you pat them dry, take a foil-lined, and greased pyrex, and arrange the potatoes, like so:


After 30 minutes, take potatoes out. They'll look like this. Don't worry, they won't be browned yet:


Give them a flip, and you'll see something like this:


Put them back in for another 30 minutes. When you take them out the second time, they'll look like this


Delicious and roasted to perfection. Flip them over to see the tops:


Oooh, gorgeous! Now here's where the green beans come back in to play. I said these two are perfect sides and they are even more perfect when they're side by side:


Another perfect thing is serving them with steak au poivre:


I hope you have an opportunity to enjoy these sides for the holidays or if not, sometime soon! Bon appetit!